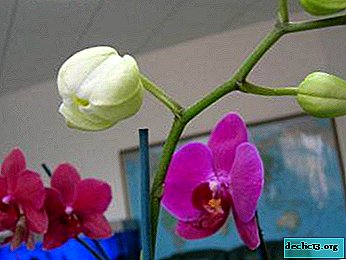
Orchid: when and how to transplant a plant?
 Only with quality care for the orchid, she will respond with beautiful flowering. One of the important points is the transplant of the plant.
This process is one of the most responsible, as the old soil changes during the transplantation process, damaged parts of the plant are removed. All this contributes to the active growth and full development of orchids.
Therefore, you need to know when you need to, how to properly transplant a flower at home and in what.
What it is?
 An orchid transplant is a process that involves planting a plant previously grown elsewhere or in a pot.
A transplant is not difficult, but, like any procedure, it has its own characteristics.
Besides, a great way to stimulate floweringwhich after this procedure will be long, lush and vibrant.
In what cases do you need to do?
It is advisable to carry out an orchid transplant in the following cases:
- Replacement of soil in which nutrients are exhausted. This happens every 2-3 years. orchid needs a high breathability soil. In addition, its pH should be in the range of 5.5-6.5.
If these indicators are higher, then the root system will not absorb certain substances, for example, iron. As a result, the leaves begin to fall off and turn yellow.
- Insufficient pot size when the plant outgrows it. As the orchid develops, it grows, so after 2 years the old container is small for it (how to transplant the orchid into another, more voluminous pot, read here).
- There are urgent reasons for transplanting orchids: root decay, resulting from the use of poor-quality soil or violation of irrigation rules. The next urgent reason is the attack on the flower of such pests as scab, tick, thrips, nematodes, slugs.
About whether to transplant an orchid after purchase and why it is so important, as well as other nuances of the procedure, read here.
The soil in which orchids are grown over time loses part of its beneficial properties. Moreover, the appearance of the soil may not be disturbed. In addition, the importance of transplanting is that the soil with regular fertilizer application and frequent watering swells and compacts.
This contributes to air deficiency and makes root breathing more difficult. If you do not perform an orchid transplant, then due to abundant watering, salt will concentrate in the soil, the amount of which grows to catastrophic volumes. This contributes to the development of burns on the roots and their gradual drying.
Competent determination of time
How to determine whether to transplant and when exactly to do it? The best time for an orchid transplant is early spring. It is during this period that the flower leaves its dormant state and begins to grow actively. And the soft spring sun will allow the plant to recover from the stress suffered during the change of residence. We wrote more about when to transplant at home and what time of year to choose, and from this article you will find out whether it is possible to transplant an orchid in the fall.
How to determine that a plant needs a transplant?
 Understand that an orchid needs a transplant according to the following criteria:
- A plant can be transplanted if the root system has grown so much that the flower has already begun to crawl out of the pot.
- Pests and diseases are wound up in the ground.
- The roots became wrinkled, pale and rotten.
- When the kids are grown, and the orchid needs a separation.
How often do you need to do this?
Planned orchid transplantation occurs every 2-3 years. More often it is not necessary, as frequent stresses will lead to a halt in development and the absence of flowering.
Inventory
Before proceeding with a flower transplant, it is necessary to prepare the following inventory:
- New capacity. It is best to use a plastic pot with holes on the sides and bottom. Thanks to these holes it will be possible to control the quality of the soil and the condition of the root system. The capacity should correspond to the size of the roots.
- Priming. You can use a commercial or home substrate. For cooking, bark, moss and charcoal are used in equal proportions.
- Drainage. You can use expanded clay, pebbles, polystyrene.
- Instruments. For transplantation, you need a sharp knife, secateurs. Disinfect with alcohol before starting work.
- Antiseptic. To process slices of orchids use a special tool "Maxim", brilliant green or crushed charcoal.
- Flower stalk holders. To fix the orchid in the container, you need to use bamboo sticks.
- To prepare for work medical gloves.
What are the ways?
 There are two ways to transplant a plant:
- On the blocks. Its essence is that the orchid is placed on a block. As a block, there may be a piece of pine bark, oak.
- To the substrate. A pot or basket can be used for this. The second option is used when transplanting epiphytic orchids, which in nature are used to growing on tree forks or stumps. When these flowers are transplanted into a pot, they will grow rapidly, but flower stalks can be lost.
But when using a basket, flower stalks will hang down, which is typical for orchids growing in natural conditions.
Pot selection
Creating favorable conditions for the root system is possible only with the participation of sunlight. So the container should have transparent walls. Another such pot allows you to control the level of soil moisture and track various problems in a timely manner. The size of the pot is determined taking into account the root system. As a rule, it should be 2 sizes larger than the roots. Buy a container whose diameter is 3-4 cm wider than the previous one. You will find more nuances on how to choose a pot for transplanting orchids at home in a separate article.
In the video you can clearly see which pots are needed for an orchid:
Ground
It is best to use a substrate of own preparation for transplantation. For this, a kidney mixture consisting of pine bark, perlite and coal (6: 1: 1) is required. Due to the porous structure of the soil, moisture will be retained longer. If you use a purchased substrate, then it should contain land and peat, and the size of the bark should be within 1-2 cm.
To avoid the development of diseases, the prepared mixture should be disinfected by boiling, and then thoroughly dried.Read more about how to choose the soil for the orchid, into which substrate the plant can be transplanted, read here.
The video talks about how to make a substrate yourself:
Features
Indoor and outdoor
When transplanting indoor and outdoor orchids, there are certain features:
- With home or outdoor orchids, replenishing the flower’s nutrition is possible only if the soil is completely replaced. So the transplant should be carried out regularly.
- In order for the plant to receive the necessary nutrition from the soil, first treat it with mushrooms. Moreover, each individual flower gets used to eating a specific set of these microorganisms.
- When replacing the soil, the composition changes to which the orchid is already used. To make the adaptation process easy and without consequences, put a little of the former land in a new pot.
Blooming and fading
The process of transplanting orchids at home during and after flowering also has its own characteristics:
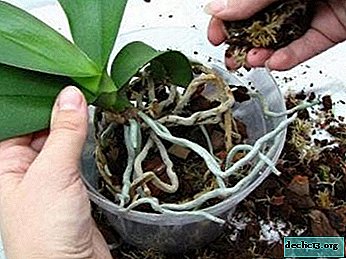 To separate the old soil from the plant, it is necessary to place the roots in water at room temperature. Cut off the rotten parts of the root system. To process places of a cut with brilliant green.
- Prepare a new substrate or use a purchased one. Pour drainage and pieces of bark to the bottom of the container with holes.
- Arrange the plant carefully in a pot, add the soil mixture to the middle. Tamp lightly, and lay the bark on top.
- As a result of the recommendations made, the soil should be loose.
More information about whether it is possible to transplant an orchid with a peduncle released, you will find here, and in this article we talked about the pros and cons of transplanting a flowering orchid and whether it is possible to disturb such a plant.
How to transplant?
We transplant the plant at home step by step instructions.
Plant extraction
A day before the upcoming transplant, a houseplant needs to be watered. Then carefully remove it from the pot, while the roots should be dry, because on moist roots the healing process of the slices is slower. To remove the flower, it is enough to lightly tap on the container or to develop it. Now carefully untangle the roots, free from the old bark and other components. Discard old soil.
Root wash
Rinse the roots under a stream of warm water. Now lay the plant on a dry napkin and wait for the roots to dry.
Root inspection
After drying, carefully inspect the plant for pests and diseases. Those places where defects were found should be lowered into the insecticide solution for half an hour. Use a disinfected tool to remove all damaged roots: wrinkled, dried, rotted. The flower should only have clean, elastic and green roots. To process places of cuts with cinnamon, brilliant green.
Read more about how to save orchid roots during transplantation, whether they can be pruned and what to do to prevent damage, read in a separate article.
Removing old leaves
Before planting, remove all lower leaves, as well as those that look lifeless and yellow. They will not be of any use. Also remove soft hollow bulbs. The places of cuts should be treated with disinfectants.
Drying out
After all the manipulations, lay the plant on a clean towel and leave for 2 hours to dry. Placement of substrate and orchids in a pot. This transplant process is carried out according to the following plan:
- Position the flower in the middle of the flowerpot and gently pour the soil mixture into it. It is important to ensure that the soil is evenly distributed between the roots.
- When planting a plant, monitor the growth point of the flower. She must be in sight.
- If aerial roots are well developed, then they should not be buried in the ground.
- It is also not necessary to compact the soil, as the root system itself will be perfectly fixed in it over time.
First watering
Once the transplant process has been completed, then install the orchid in a shaded place where the temperature will be 22-25 degrees. Watering is done only after 5 days. This time will be enough for all the damage to heal. Also, this will make it possible to make the pathogenic microflora penetrate into the roots.
When watering, it is worth following a few recommendations:
- Use soft or moderately hard water for the orchid. Understand this indicator at home only by scale in a teapot. The more it is, the higher the level of rigidity. To lower it, put oxalic acid (1/8 teaspoon per 5 liters of cool water) into the water. You can buy this product at any flower shop.
- Before watering, it is necessary to determine the acidity. It should be within pH 5. To test this indicator, indicator strips will be required. They have a special scale. The temperature should be 35-40 degrees.
Photo
Next, you can see a step-by-step photo of how to properly transplant an orchid at home with the earth, how to plant children from a flower:


How to plant a baby from a mother’s flower at home?
To separate the baby from the mother plant, you must use the following instructionsHow to plant them at home:
- How to plant a home flower? Cut the baby from the plant. Just do it not completely. It is important to leave at least 1 cm of peduncle.
- Leave the baby for half an hour to dry the base. Sprinkle the cut with powdered charcoal.
- To plant the baby you will need a disposable cup in which to make several holes.
- Place the appendix in the center of the container so that the root neck is centered at the edge of the cup.
- Evenly distribute the roots across the container.
- Hold the baby with your hand to fill the container with the substrate. If not all the roots fit in the pot, then you can leave them on the surface.
- For a full subsidence of the soil, you can tap on the walls of the glass. Do not compact the soil to prevent damage to the roots.
More details on how to transplant an orchid's baby, if she gave a sprout on a peduncle or root, can be found in a separate article.
Possible problems
After the procedure
After the orchid has been successfully transplanted, leaves may fade. This problem occurs due to insufficient moisture, so drying the substrate is not worth it. To restore the plant, it is necessary to normalize the irrigation regime. Even the leaves may fade as a result of direct sunlight. For a week after transplanting, keep the flower in the shade.
During her
The only problem that arises in the process of transplanting orchids is the long healing of the roots. The reason is that flower growers too fill the soil in the old pot when the branches are removed. Because of this, the roots get very wet, and after removing weak and damaged roots, even the treated cut sites begin to rot. In order for this problem to pass by, it is necessary to carefully dry the plant, and only then carry out various manipulations.
In more detail about what problems may arise after transplantation and how to deal with them, we wrote in this article.
Care
Watering
 The process of moistening the soil after an orchid transplant has certain features:
- Water the orchid for the first time after 5-7 days. Otherwise, the wounds on the cut roots can rot.
- Perform the next watering 2 weeks after transplanting.
- For humidification, boiled water at room temperature with the addition of nutrients is used.
- To saturate the soil with useful substances, lower the flower pot into a container of water for 15 minutes.
It is important for the plant to create a certain level of humidity. And for this, place the plant in a plastic bag. Open it periodically for ventilation and spray it regularly.
Temperature and light
When growing a flower after a transplant, the temperature regime should be in the range of 15-25 degrees. Install the container on a window with diffused lighting. A window sill with a direction to the east is best suited. In the first week after transplanting, shade the orchid, especially the upper part.
Fertilizer application
Immediately after the transplant, feeding is not worth it. To do this, wait 3-4 weeks. There are situations when top dressing is not required for a month, then use formulations that contain high concentrations of potassium and phosphorus. They need to be made once a month.
Transplanting orchids is a complex and responsible process, which a beginner can not cope with. In this matter, mindfulness and a responsible approach are important. Then the whole process will pass quickly, easily and without consequences.
Useful video
In the video, we will clearly see how to transplant orchids correctly:

 To separate the old soil from the plant, it is necessary to place the roots in water at room temperature. Cut off the rotten parts of the root system. To process places of a cut with brilliant green.